Training Cascade with OpenCV
Platform: Linux/Ubuntu
Preparation:
You may have to prepare two different types of images for training a Binary Classifier Model, the positive samples and the negative samples.
Here, we gona to use image database from UIUC Image Database for Car Detection to demonstrate how to use OpenCV to detection cars in a image.
User should put all positive samples which have the same size into a directory.
ls ./pos > ./pos_list.info
ls ./neg > ./neg_list.info
Open pos_list.info and you will see the path of images have been written into the info file.
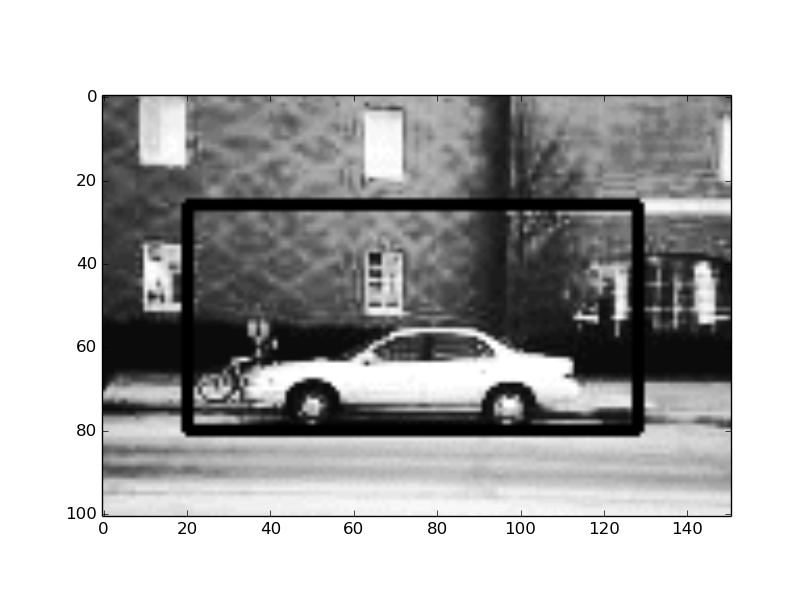
But it isn’t enough. To train the cascade with OpenCV, you should supply with the information where is the object in the image. In this demo, what we want to detect is a car. The information that OpenCV need like this: image_path num x y w h, which should be append at the end of the path of a image.
x y w h describe a rectangle which identify where is the object that we want to find. num describe how many objects in the rectangle.
So, I write a script in Python and this script will help to finish that job.
|
|
Run the following comand:
opencv_createsamples -info pos_list_new.info -num 550 -w 48 -h 24 -vec cars.vec

opencv_traincascade -data data -vec abc.vec -bg neg_list_new.info -numPos 550 -numNeg 500 -numStages 2 -w 48 -h 24
opencv_createsamples and opencv_traincascade are two tool program with OpenCV. The original positive samples for training are images with 100x40 pixels. For the training process, it will cost a lot of memory, so we resize it into smaller one. With that command, -w 48 -h 24, positive images are resized into smaller images which’s width is 48 pixels and the height of that is 24 pixels.
Here, we can use this script to test the model that we get.
|
|
Result:
Reference:
- http://blog.csdn.net/wuxiaoyao12/article/details/39227189
- www.youtube.com/watch?v=WEzm7L5zoZE
作者: Jason Leaster
来源: http://jasonleaster.github.io
链接: http://jasonleaster.github.io/2016/05/19/training-cascade-with-opencv/
本文采用知识共享署名-非商业性使用 4.0 国际许可协议进行许可